Monday, October 12, 2009
Ants in Their Pants (in Bed)
They've been sleeping with the real estate-friendly beige walls since they bought their house a few years ago. Now, they're hoping to go for something rich, deep, and moody-chic.
They first mentioned something about a deep red but, having lived with a purplish-red hallway for awhile, I warned them about it feeling too goth...especially in a boudoir...especially in this age of True Blood.
Then they sent me this color!
They like this jewel-toned blue very much because it provides a big WOW! factor against the white but still works with wood (floors and trim). It's almost perfect, they state, but they started thinking, "Maybe a little more grey...."
And I agree. Their bedroom is coming off a rather dark and narrow hallway so neutralizing it a tad is probably a good idea. But I do think, with two big windows, the bedroom can handle a shade that's fairly dark. So I checked out the Virtual Fan Deck at Benjamin Moore and found...
...Bella Blue! It's a little greyer, a little lighter, it's beautiful, AND it's got some significance to Alison Rose, as it shares a name with the manufacturer of their screen-printed t-shirts. Voila!
Wednesday, September 30, 2009
Brick House's DIY shelving unit

I tip my chapeau off to Brick House and her badass DIY shelving unit. Follow her instructions to make your own.
Wednesday, September 16, 2009
A Bath Tissue Issue
Sometimes DIY just doesn't work...or doesn't look right, anyway.
If your shower is in this same situation, email me and I can send you at least 30 coupons to Bed Bath & Beyond.
Friday, June 12, 2009
Bonus Bone: Mod Toolboxes
For these reasons, I, Cardboard, declare this a Design Boner.
Thursday, March 26, 2009
Do It Your Own D*mn Self

Crystals, leather, lace, fringe, notions, plastic bags, sequins, and much more crafty goodness is for sale this weekend for super cheap.
Details:
Do It Your Own D*amn Self - Craft supplies for super cheap
Saturday, March 28
12-4 pm
Pulaski Park Field House
1419 W. Blackhawk, Chicago
Thursday, December 25, 2008
Happy Christmas!
Tuesday, December 02, 2008
Peace wreath
Grapevine peace wreath, at Tonic HomeWednesday, May 21, 2008
From Neck to Knock
DIY instructions on how to turn this demure necklace into a front door knocker.
Wednesday, January 16, 2008
Plate Tile
Covering Plates, designed by Karl Zahn Monday, December 31, 2007
Cardboard's 2007 Accomplishments
So as I fluff the pillows for 2007's big sleep and feel the eager breath of 2008 on the back of my neck, I find myself loosely wrapped in reflection. I spent the past few days puttering about my house, full of coffee and thought. I'm listing my 2007 feats here to help me figure things out, to allow myself to (as they say) recognize. I hope it moves you to make your own list, whether you choose to share it or not.
I turned 30 this year. My darling family sent me a gift for each year, each individually wrapped and stuffed together in one big exciting box. And I celebrated this milestone with (what else?) Meat Cake.
I also began erasing the unfinished details of a relationship gone very bad. This is part of the "worst" of my year and I'm, even now, getting rid of the evidence. I'm also still working through my feelings on the matter, as angerhurtregret tends to crave attention. But I'm proud of myself for...um, jeez...still being here...not playing dirty...and something new every single day.
Then my sister Bamboo moved in! Yippee! For her arrival, I had to quickly turn a room that had been an office/art studio into her new bedroom. The "junk room" had plywood subfloors, no window coverings or baseboards, and was covered in paint splatter. I didn't necessarily want to "finish" the room (install flooring) because, if she moved out quickly, I wanted the option of making the room messy again. So, I dismantled the stage tech shelving, fixed the holes in the walls, and painted the room. Then, using my limited resources (money not being one of them), I made baseboards from wallpaper, commissioned curtains from our favorite seamstress, and stained the plywood to look almost rich. And I done did it all by myself. Awwww, yeeeeah.
I made some new friends this year, both IRL and in the blogosphere. I also re-connected with some lost pals and grew a bit closer to those currently in my address book. Believe it or not, I planned and/or hosted my first grown-up parties (outside of a dorm room).
I auditioned for and got a part-time editor position with the much-revered Apartment Therapy (Chicago). This is my first PAID freelance-esque writing gig. Working for AT has not only created connections and opened up avenues, but has also hinted to me that I might be able to do what I love - to write - for a living.
And so I wrote. One of my short stories was published in an anthology called Further Persons Imperfect. This project is important to me on many levels. It's my first piece of published fiction. I worked with a tremendously dedicated and talented group of writers to create the book in full. I also conceived the book's design, roping Porcelain in as the cover model and lassoing another friend of ours to take the photograph. All in all, it was a successful collaboration. Since I had spent the early half of 2007 regretting joint projects, the efforts put into this book restored my faith in partnership.
Now onto my continuous struggle with King Neptune. I certainly can't say that I've won the war against His H2O Highness and I won't even dare say that I've won a battle (without knocking on solid, firm on-land wood). But I have held my own. This year, Neptune lashed out hard and obvious with one doozy of a Chicago storm. Flooding threatened my humble abode and I held it back. Recently, Neptune moved in, cloaked and insidious, with a behind-the-wall leak from my bathtub faucet. I (thought I) had the leak figured out and fixed. I patted myself on the back for the decent albeit amateur regrouting/retiling/recaulking job. I started to (foolishly) believe I could see Neptune coming. But, after all the repair work, he came back with the same exact sneaky leak that was there before. King Neptune, you're officially a jerk but I now see the value in our sparring because I'm learning from you. Whatever doesn't drown me, only makes me stronger (and more buoyant).Lastly, there's design boner and all you guys. Each of you reading this is one more reason to write it. Thanks for making 2007 mean something, especially you, Porcelain. You're the best friend a little ol' scrap of Cardboard like me could hope for.
Wednesday, November 28, 2007
Weekend Plans #1: Holiday DEPART-ment!

It's Holiday DEPART-ment time! This 3-day craft extravaganza is taking place this weekend. Here are some key details:
2000 W. Fulton #310 (third floor), Chicago
Friday, Nov 30, 7-11p
Saturday + Sunday, Dec 1+2, 11a-5p
cash only/atm onsite
Not only will I be shopping there for unique gifts but I'll be selling stuff too. For the first time in a year, Love Lights are back on the shelves. "Satin Chains" is still available (a big pink Yay!) but "Wild Roses" has been sold (sorry!).
Love Lights = $12 each
Mama Cardboard has joined the craft movement. She's adding in a couple knitted grocery bags:
Grocery Bags = $20 each
...and super sweet felted bowls in four sizes and a multitude of colors:
Felted bowls = $6 - $18
Mitts = $14/pair; Legwarmers = $16/pair; Alison Rose T's = $15 - $30
Also, there's a good chance Alison Rose will be sending me some T-shirts to sell too (see above, right). I'm patiently staring at the mailbox (fingers crossed!) for her box of merch to arrive.
For more info on how DEPART-ment works or to take part in the next one, read this great little interview with Craft Magazine.
* For the first person (other than Porcelain) to find my head in this photo, I promise to donate $10 (or a box of nails) to Habitat for Humanity in your name. Happy hunting!
Tuesday, May 01, 2007
Screwed

Does anyone have any good tips for taking out drywall anchors? As I prepare to paint the walls in Bamboo's new bedroom, I am finding that my ex-roommate left me with at least 8 pairs of these suckers. Nice.
Tuesday, April 24, 2007
The Stain
Midway through the process, late on Friday night, I realized that I should have worn some gloves. I don't know if it was the fumes or the self-empowerment of home-improvement that made me grab the camera (carefully!) and snap some artsy hand photos. These photos mean a lot to me because they're proof that I can do this stuff all by myself and have fun at the same time. If only I had remembered to buy paint thinner...
Saturday morning, I returned to the store, with my stained fingers, to buy the polyurethane (and paint thinner). The poly was sooooo much easier to put down than the stain because I applied it with, basically, a mop. The stain took me about 3 hours to lay down, with lots of arm work and knee grief, and the poly only took about half an hour. Sunday morning, I did a quick sand, which my shoulders and knees did NOT appreciate, and applied the second coat of poly.
The floor is dark, shiny, and still drying. I'm going to let it sit for the suggested 72 hours before I go back in there and take pictures. But I will let tell you that it's probably the swankiest subfloor I've ever had the chance to, well, create.
Thursday, April 12, 2007
Project: Bedrooms
The walls in my bedroom are painted a very light grey shade. I've painted this room 4 different times and still can't manage to get rid of the lavender tint. Since I can't quite seem to get it right, I'm leaning toward a mature taupe. And, speaking of lavender, yes, my closet doors are stained a really awful orchid-y purple. It was a mistake. I got carried away. I need to change this immediately. Any thoughts?
I still love the wallpaper wall I uncovered soon after I moved in and started peeling away old paint. I plan on keeping that feature. I also like my bed frame a lot but I just don't like the color of the wood. I can paint it, rough it up, or stain it a new shade. Again, I welcome your feedback! The red duvet will be thrown out soon so don't let that sway your opinions.
I don't think I can afford to buy a truckload of new bureaus so for now they stay. Like the bed, I would like to change their appearance. The window treatment was meant to be a temporary fix about 2 years ago. Let's re-think that too, shall we?
This room is now what I call my "junk room." The floor is plywood covered partially with a carpet remnant. The walls are only primed white and paint-splattered in places. This is the room I can make a complete mess in and not worry about a thing. Since my sister will only be living with me for a short time, I don't want to finish this room completely. Once she moves out, I hope to reinstate the messiness. This means that I will paint over the splatter but I don't think I want to put in a real floor. I've been interested in the idea of painting wood floors and I wonder if this might be a good chance to try out something fun. What do you think?
I do need to get all this chaos out of the room, which may prove to be a challenge. Also, I'm not sure if I should leave up the quick shelves (located above the desk). I would also like to find (or make) some fun curtains for her big sunny window.
As you can see, I've got some work ahead of me. I would really love to hear your ideas so don't be bashful with your comments!
Tuesday, January 30, 2007
Translation: Flowers cut short
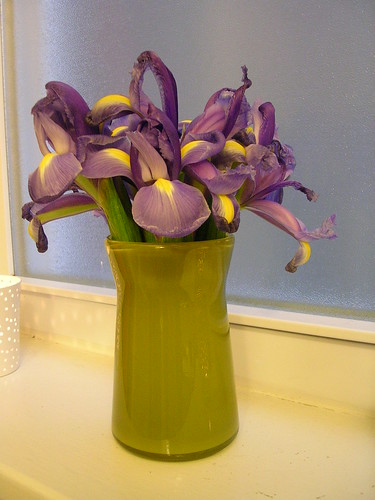
Later in the week, I grabbed a bouquet of irises, snipped the stems and placed them in my favorite new vase I bought at DEPART-ment. Here's the result.
It was a fast, easy project and every time I walked past the flowers I smiled. Domino reminded me how much I love irises and this was a simple way to change up the way I normally display them.
Sunday, July 16, 2006
How to: Candelier
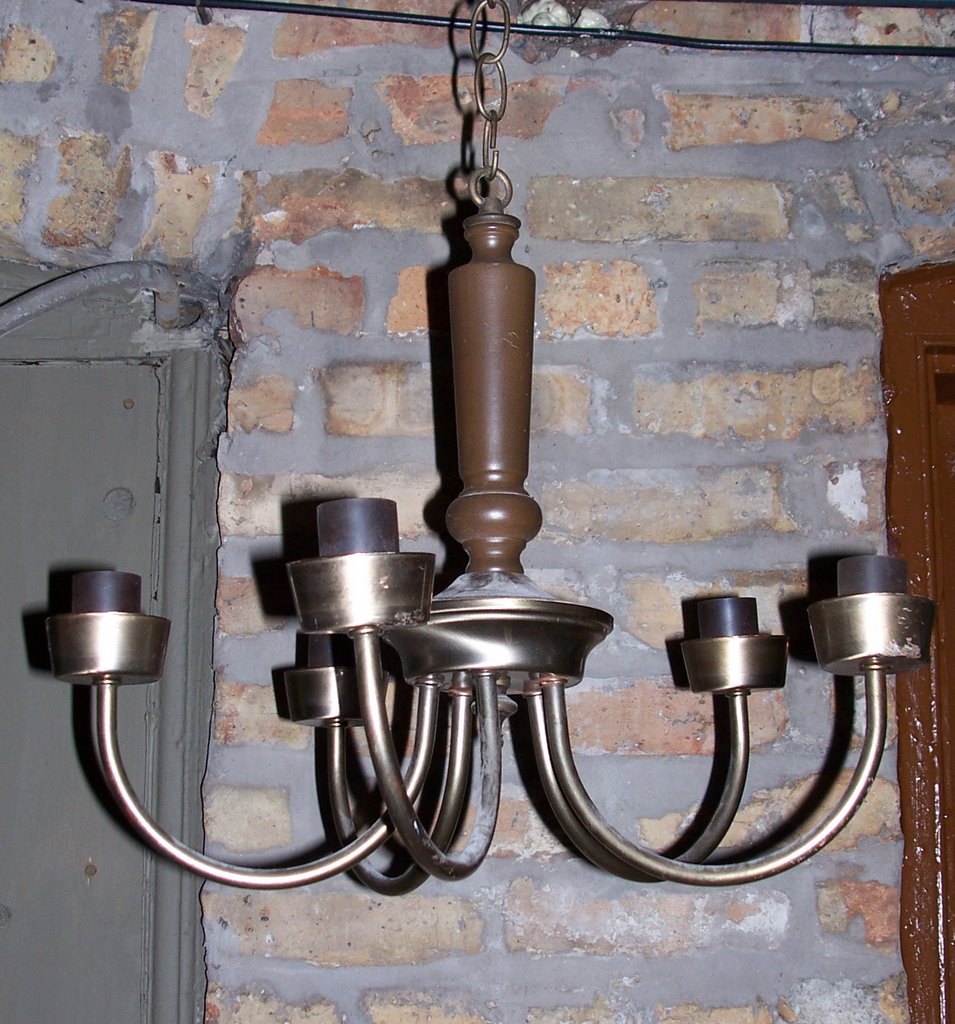
The Candelier!

To find your own, scan thrift stores, garage sales, flea markets, even the alleys behind renovation sites for cheap or free light fixtures. You will definitely want to start with a low-priced item until you master your craft. Remember, you can always dress it up later with baubles and crystals if your end result turns out well.
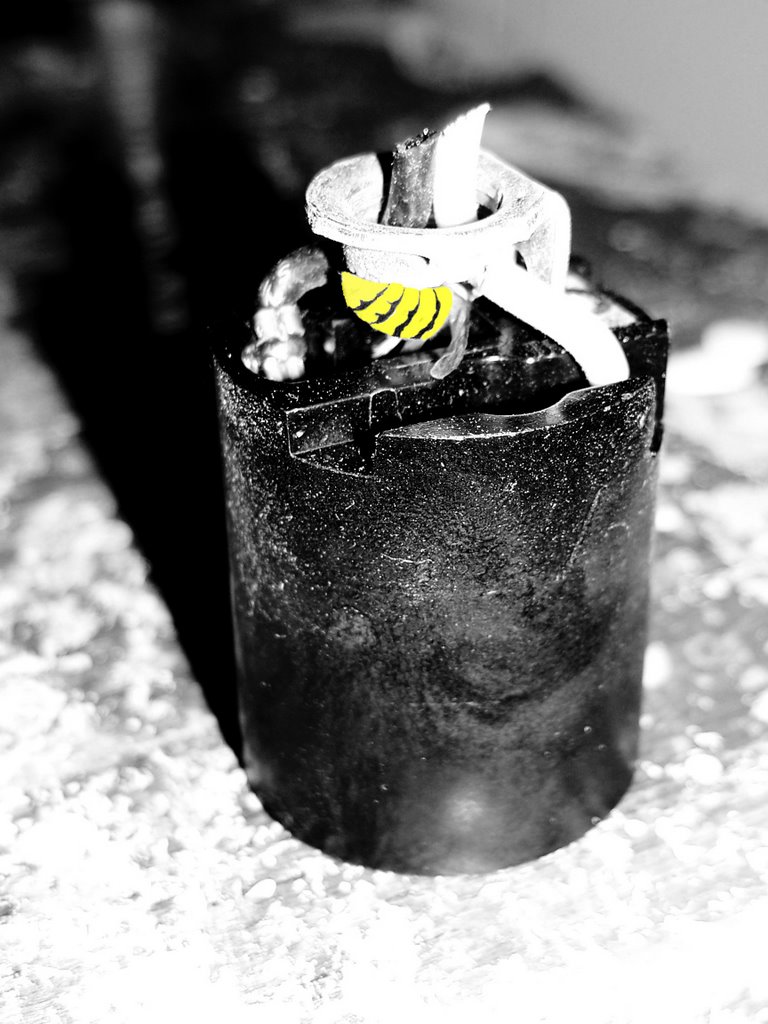
The best way to get to know your material is to know how it fits together. For this step, we removed the chain, slid the wooden stem off, and jiggled the light socket cups. If you're planning on actually using the electrical on your fixture, this step is crucial because you need to check the wires for damage. Bee careful when you do this because you never know what you might find inside any old piece of furniture or fixture.
In fact, if you're keeping the electrical element, the best advice is to take your new purchase to a professional to make sure that everything is in working order. And since you're spending the money to do that, you may skip STEPS 2 & 3.

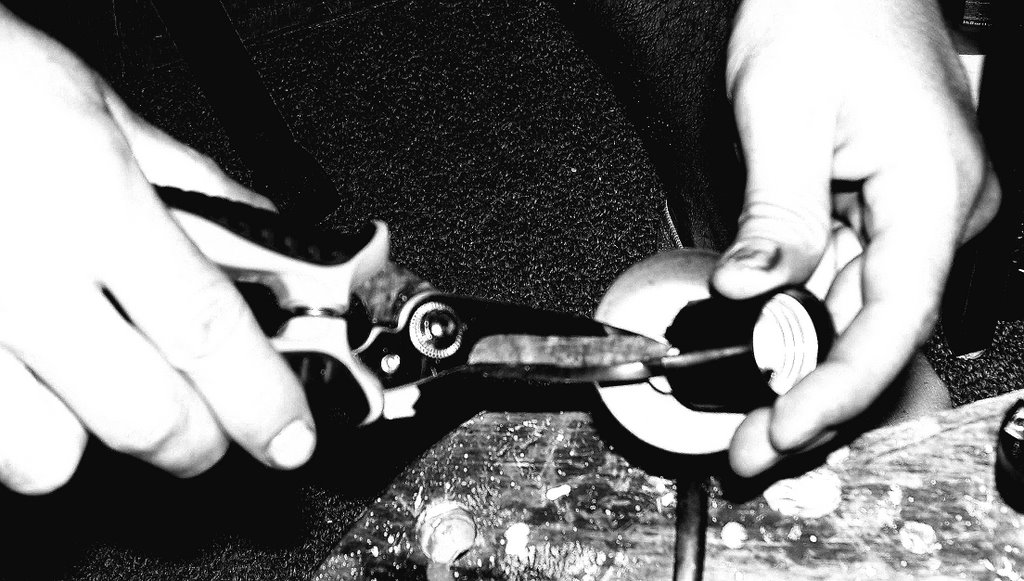
This step spills over from STEP 1. At first, we entertained the idea of leaving the sockets in place. They would work quite well as candlestick holders but we would be limited to buying tall, thin candles. Since this piece was planned for the outdoors, the idea of spindly stick candles blowing and swinging about in the wind did not appeal to us. By removing the sockets, we opened up the option of using short pillar candles, which would be heavier and more centered, lessening the chance of a waxy rain storm. We removed the sockets by unscrewing the nuts at their base, pulling up on the sockets, and clipping the wires that held them in place. We then reattached the cups by screwing the nuts back in place (sans socket).


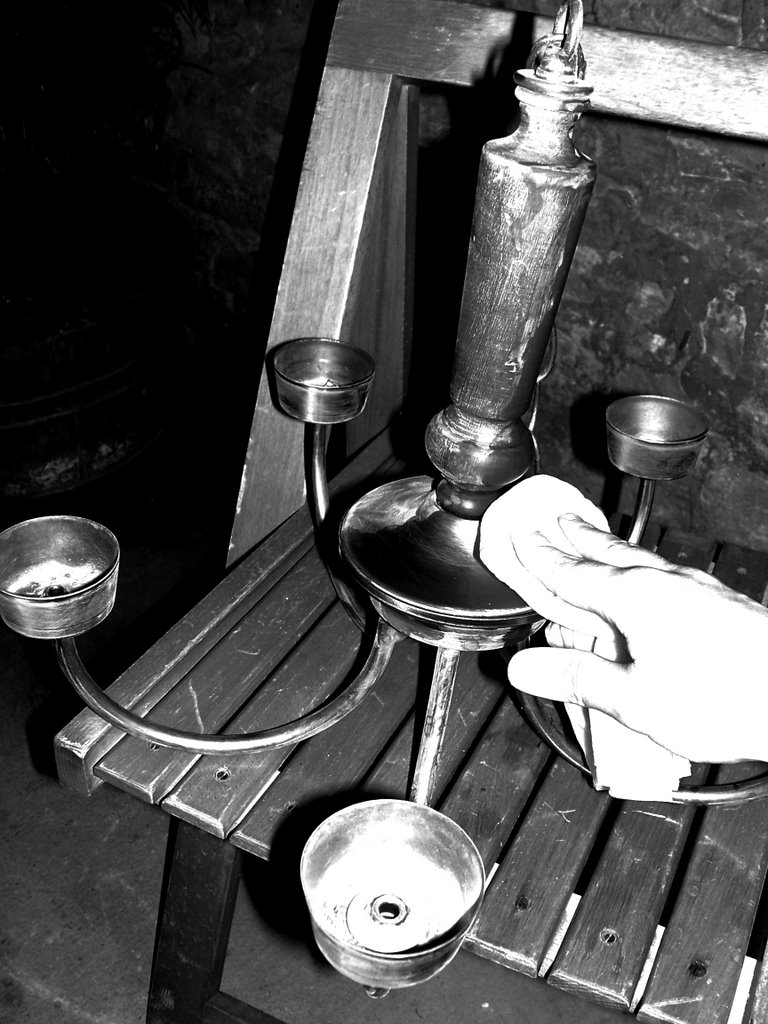
After sanding, brush off the loose dust and wipe clean with a rag soaked in rubbing alcohol or other type of degreaser. This step not only cleans off the fine dust but it also removes oils and residue left by your fingers which will prevent a uniform coat of lacquer. You may use acetone or lacquer thinner but they contain harsher chemicals. Rubbing alcohol gets the job done and isn't quite as severe. Your fixture will still look very scratched up at this point but don't worry; none of the scratches will show through the lacquer.

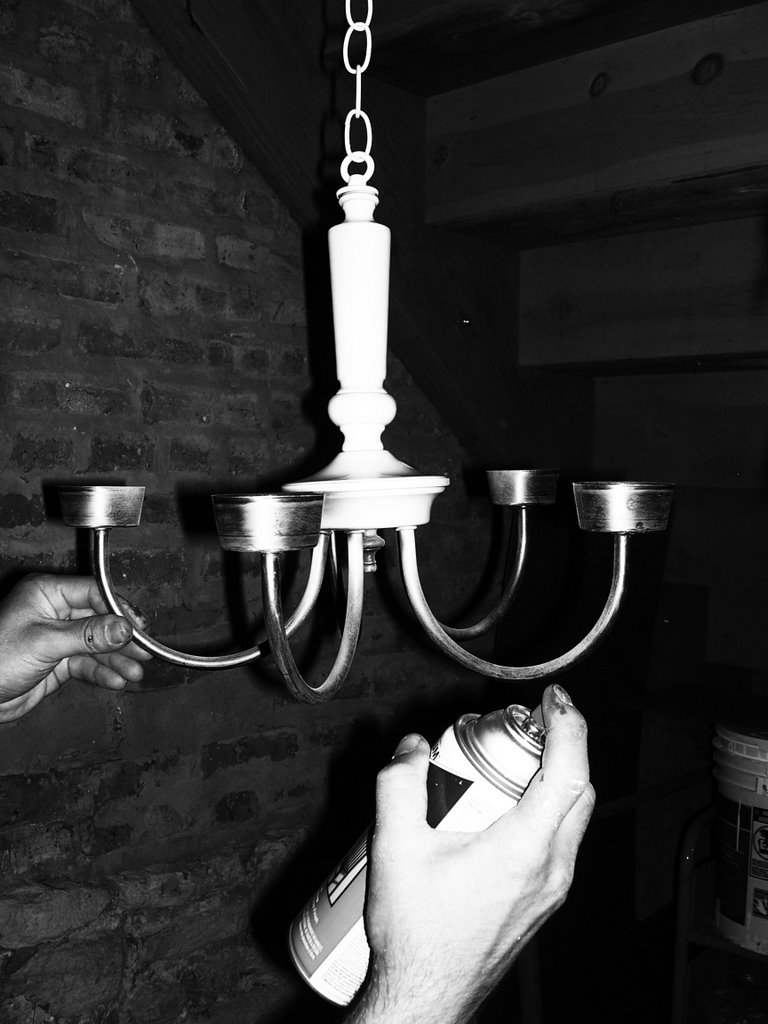
Before you begin, you may want to test your skills on scrap wood or the inside of your trash can. Mastering the aerosol can might look easy but it takes some practice to avoid those tell tale drips. After your test run, hang the fixture somewhere that allows you to reach it from all angles. It's best to find a spot that isn't pristine as tiny particles of lacquer will fly around. Begin with a "piss coat" or a very thin layer of lacquer (or paint) across the entire piece. Professional painters coined this term and they swear that it helps "introduce" paint to the surface, allowing for better overall coverage. Start at the top and work your way down in even strokes. Keep your spray hand constantly moving because if you focus on one spot, you'll apply too much lacquer to that area, and end up with messy looking drips.
Continue coating until you feel that you've gotten to every little nook. If your goal is optimal depth and shine, you should let the first coat dry, sand it all over again, and apply another coat. Keep at it until your vision is achieved. Another benefit of the lacquer is that it dries in about half an hour; whereas spray paint can take a minimum of two hours to fully dry.

We hope that you have a chance to try this out for yourself. We'd love to hear your feedback on our first "How to..." post and hope that you'll send in your own tidbits of advice. Also, if you've been trying to figure something out but can't quite get it, send us your "How to..." ideas. We welcome any challenge! Until then, happy candeliering!